[Part 3] Building NAScrate
You might want to read these in order. This article is part of NAScrate series. Other articles in the series:
- [Part 1] NAScrate - the budget for the budget NAS
- [Part 2] NAScrate design
- [Part 3] Building NAScrate
- [Part 4] NAScrate files and final thoughts
You can also see all articles in NAScrate series or subscribe to the RSS feed for this series.
Finally there🔗
I pinky swear it doesn't take 4 months to build the NAScrate. I actually had it done and dusted in couple weeks - most spent waiting for the components with couple evenings spent with Onshape trying to figure out how to fit everything in a small crate. I just didn't have enough time to properly document it, hence the delay in updates.
This last step only took couple hours at most - and that's including re-designing and re-printing some of the parts. Building next one with all the parts ready is 30 minute job easily. So let's give it a go.
Screws used🔗
Your PSU probably came with screws to mount them inside the computer case, we will use those to mount the brackets. For hard drives, you will also use usual HDD screws - you probably have couple of them lying around, if not there are PC screw kits available - just shop around. Some computer stores have a ton of spare ones and will gladly share handful of them for free.
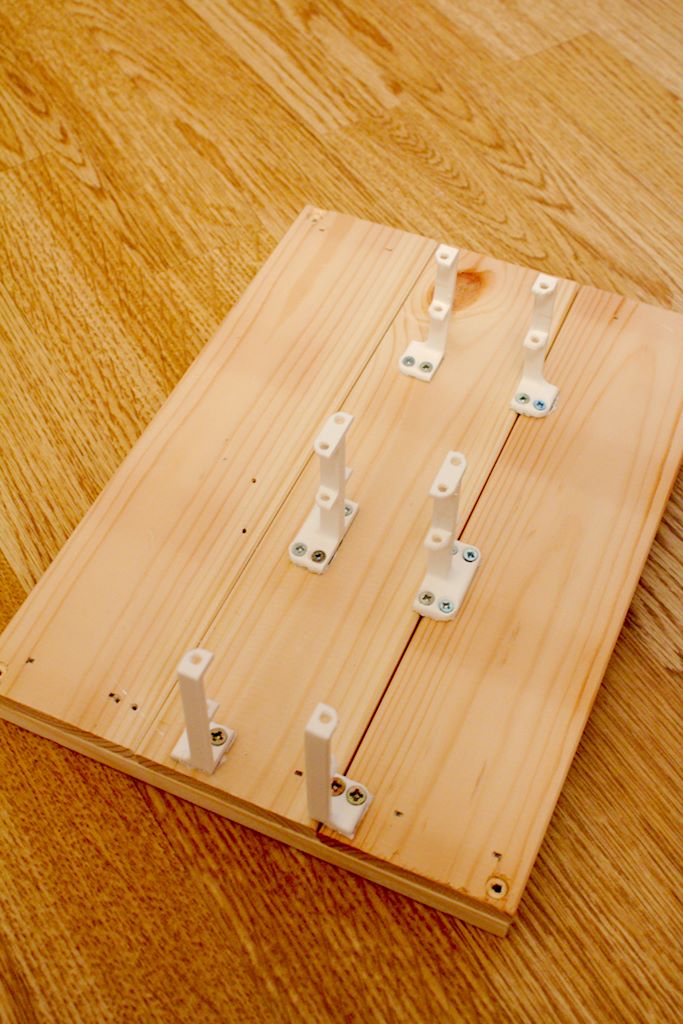
To actually fix the components inside the crate, you will need self tapping wood screws. Preferably with Phillips flat head. I've used 3.5x12mm screws, which is the biggest size I'd recommend using - any longer than that and the screw will go through the wall, wider screw won't fit into printed parts. They might look small, but the only really heavy parts are the HDDs and they will be fixed in place with multiple screws. They are definitely strong enough to hold everything properly.
Power supply🔗
I've started with PSU. Partially because it's the easiest component to install, partially because that's the one where I wasn't really sure how will it fit in. The specs (that I've found) are somewhat liberal, which can always be an issue with my self-imposed limits in this build.
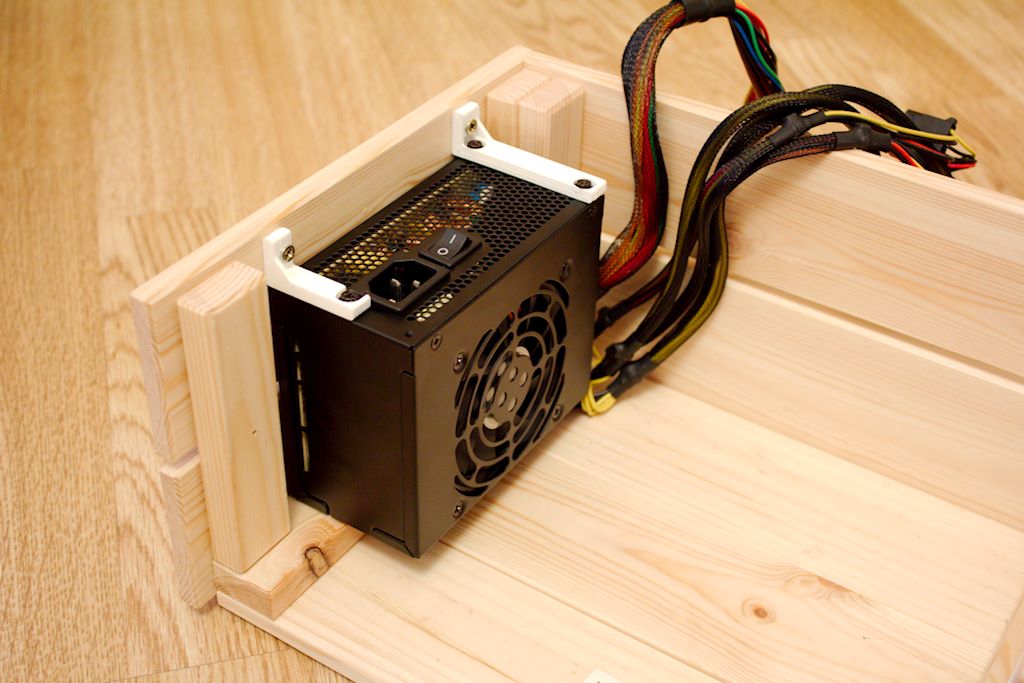
As you can see, it's quite a snug fit. Only few millimeters to spare. There's barely any space for the cables. (which worried me the most as PSU manufactures tend to be quite creative with their placement) Also I'm still not totally sure about the orientation of the fan. It won't spin under current load, so it probably doesn't matter anyway.
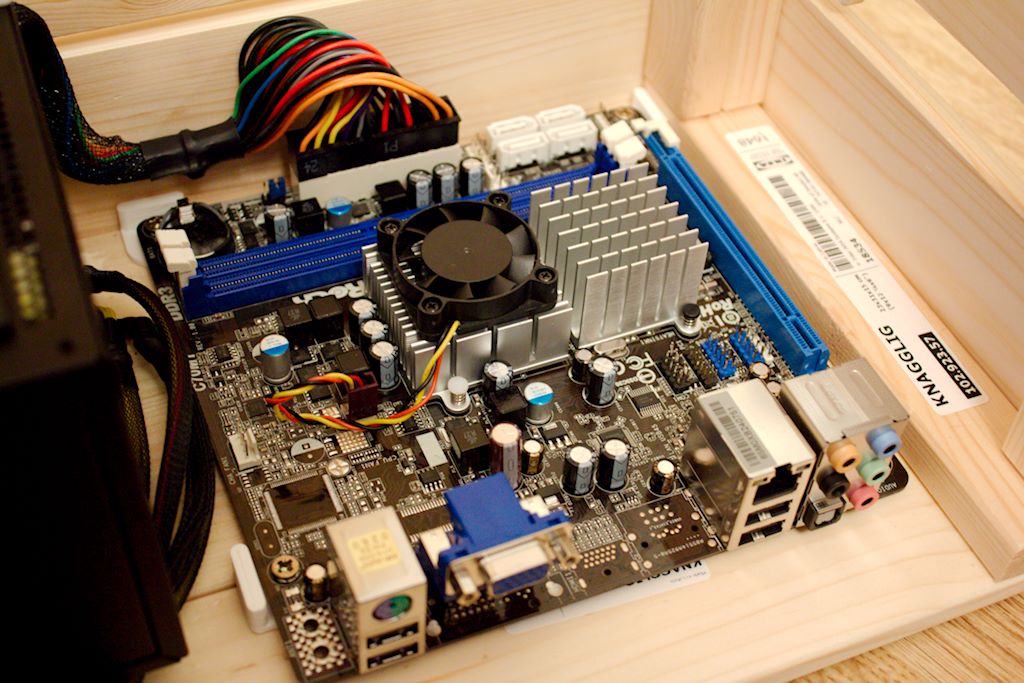
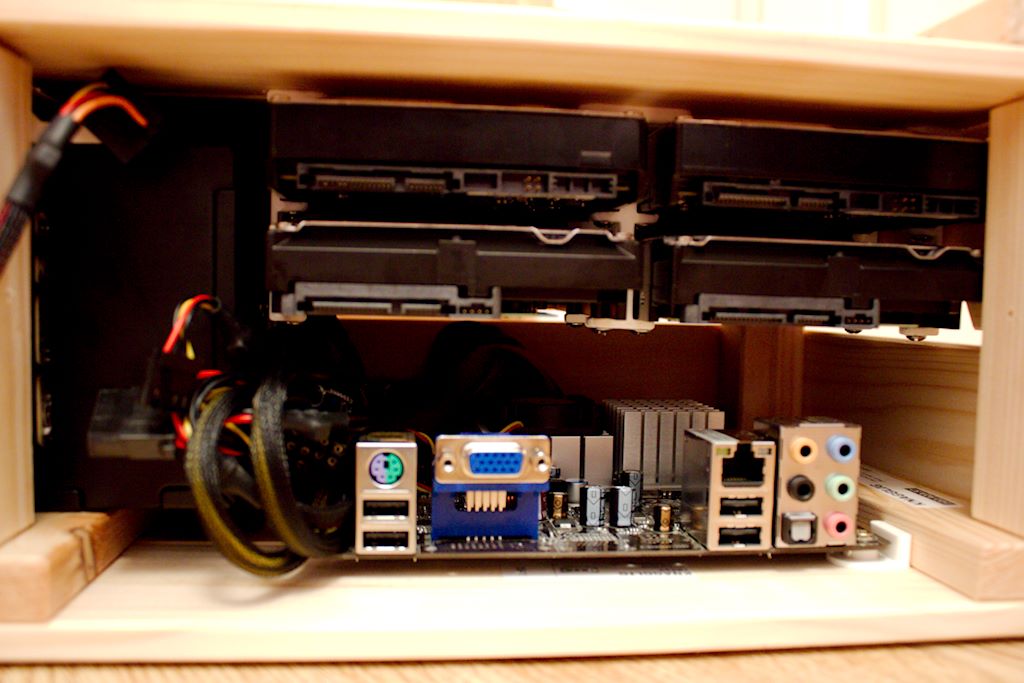
Motherboard🔗
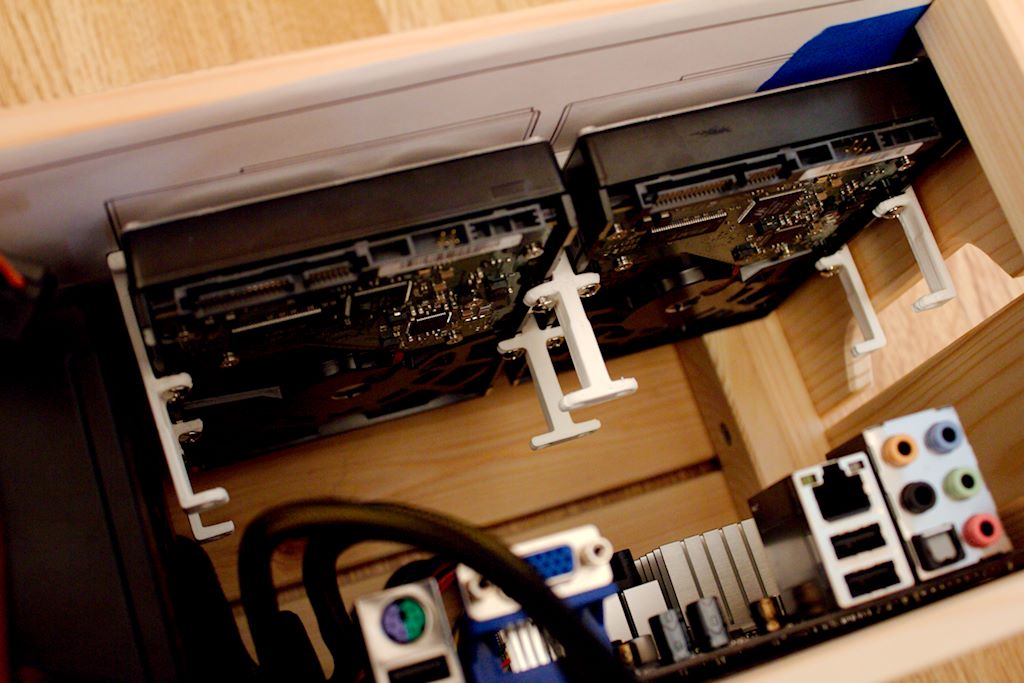
Motherboard is next to go. This one is easy to fit in, but needs a bit of thinking in terms of connector placement. I have some plans to make nice side panel with USB and LAN ports, so I might have to reorient the board for that.
Drives🔗
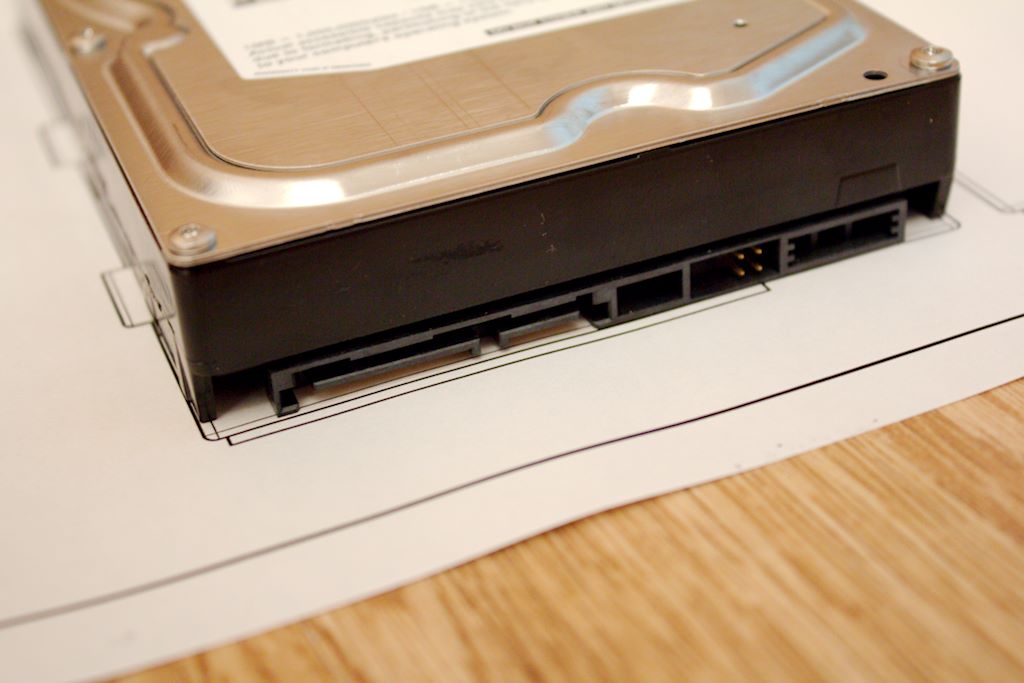
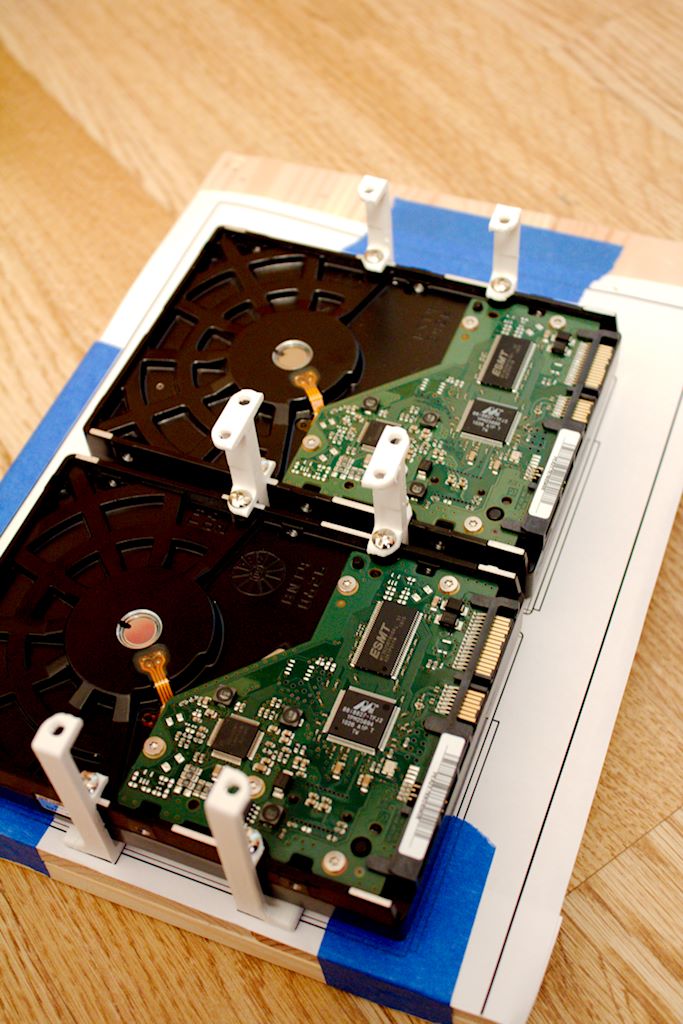
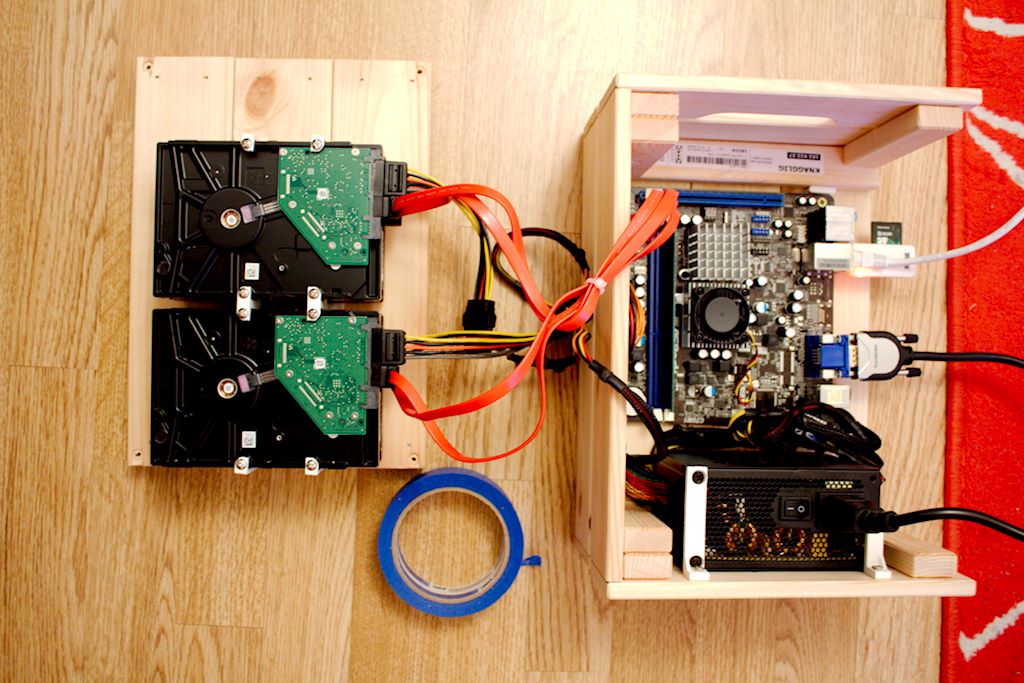
Think about how you want to orient your drives first. With the PSU on the left side, there's really tight space on the right end. The drives alone will fit just fine, but you also need to leave some space for connectors. This means, that if you want to deploy all 4 positions, you will have to orient the drives in a way where the SATA connector will be further away from the right side. Keep that in mind.
I've created a handy layout document that you can tape to the top cover to guide you with the drive brackets positioning. That way you can make sure all the drive brackets will be placed correctly and that the drives will actually fit in that location. Again we only have couple millimeters tolerance here - it's not too complicated to fit within that space, but printing out the layout makes this quite a lot easier. When you print the plan, remember to avoid any scaling (fit to page width or similar) and print at 100% scale. Place the actual HDD on the printout to see if the scale is right.
Once the plan is fixed to the top cover (obviously using the famous blue painters tape) try to check one last time if drives will fit correctly. (including the connector) Always a good idea to measure twice. Then just follow the plan with individual parts and screw them in.
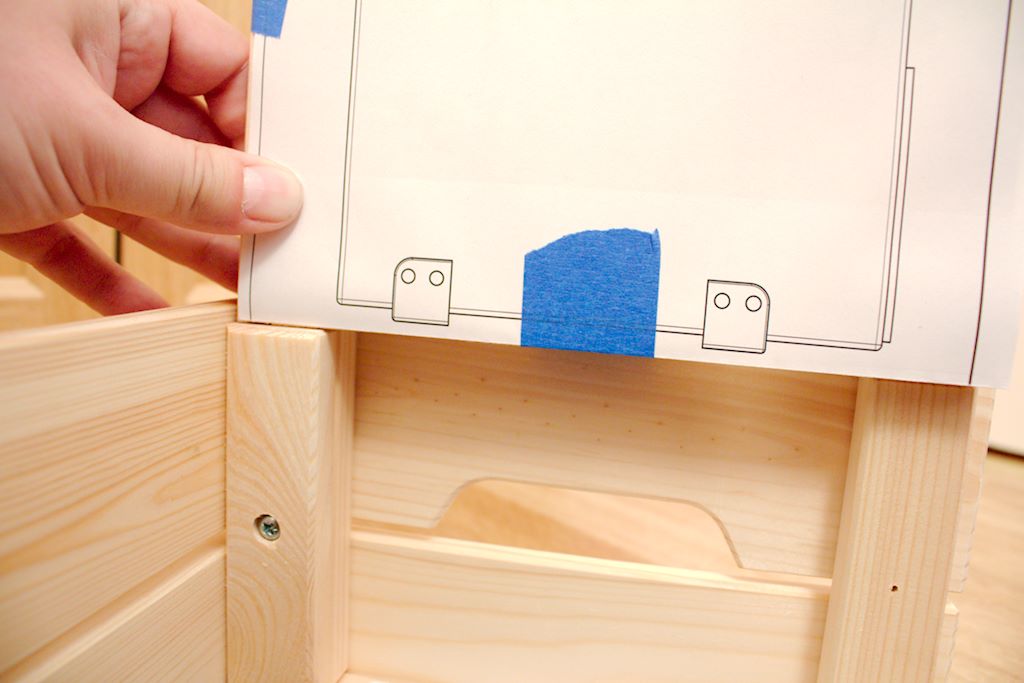
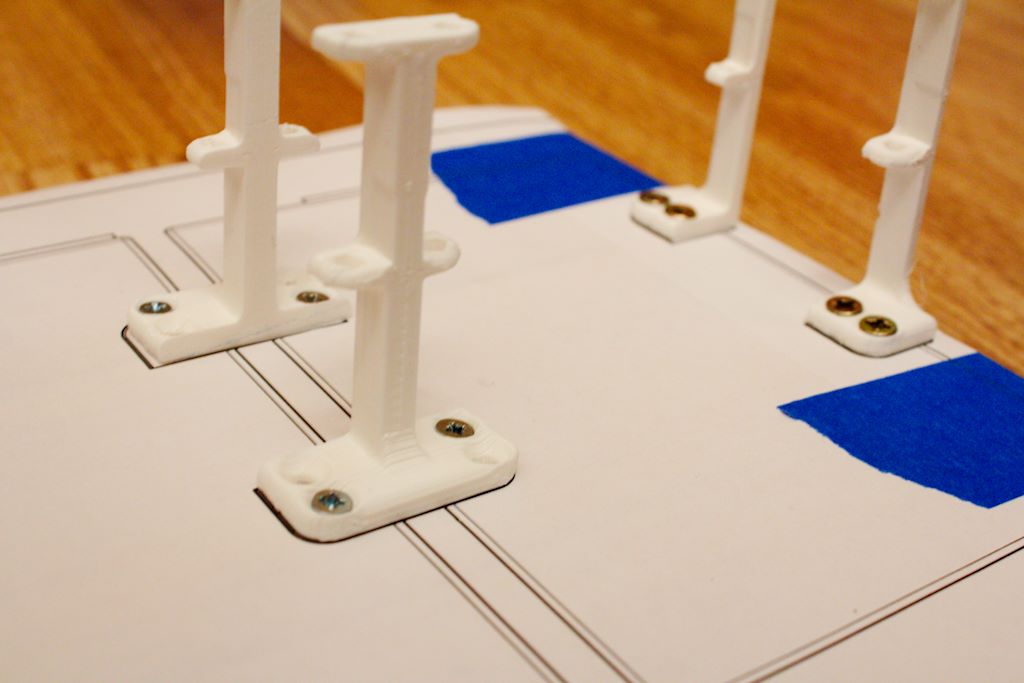
I recommend testing with drive (you don't have to screw it in) to see if the holes align correctly. It doesn't have to be 100% right, the plastic brackets can bend a bit, but the closer you get the better.
Finally, when you're done, tear away the plan, you shouldn't need it anymore. (you can always print out a new one if you mess up)
Now it's time to mount in the drives and see if the whole thing fits properly. Start with two drives - in case you need to redo the whole thing, it's less screws to remove. Afterwards install all four drives and give it another go. Hopefully it'll all fit together well and there's enough space between motherboard and the drives. It's starting to look really cool, isn't it?
Testing🔗
As a final step, I'm testing the whole setup with all drives connected. You can see live Ubuntu (IIRC) booting from the SD card reader and hidden underneath, there's small USB flash drive for the OS itself. I've did a quick test with the whole thing open like this to see if all devices are detected correctly.
Afterwards I did yet another test with the whole thing closed while sending there about 3TB of data and constantly monitoring temperatures with SMART. Unfortunately I forgot to save the measurements, but the end result is, that the drive temperatures shouldn't be a problem. This is obviously going to depend on what kind of drive are you using. If the temperature becomes a problem, I was thinking about placing a small fan just above the PSU to move air inside and push hot air outside the crate.
This article is part of 3dprinting category. Last 4 articles in the category:
- [Part 4] NAScrate files and final thoughts
- [Part 2] NAScrate design
- [Part 1] NAScrate - the budget for the budget NAS
- Why would you want 3D printer?
You can also see all articles in 3dprinting category or subscribe to the RSS feed for this category.