Free SSL with static website on S3
So there's this nice thing called Let's Encrypt, I'm sure you're already aware. If you want to get free certificate for your website in an automated way, it's definitely great. However in my case I would have to make sure to renew the certificate before it expires, which would defy the whole point of using static website on S3 - that is, unless I want to change something, I don't have to touch it. I could perhaps set up a daemon somewhere that would take care of it, but then again I would have to make sure that the service actually runs.
Fortunately, there is a way to get the same results with just AWS services.
Getting the certificate🔗
As of recent, you can get a free Amazon-signed certificate with AWS Certificate Manager. You just submit a request and wait for the confirmation email.
The email is sent to address in the whois records and some extra addresses like admin@example.com, so make sure you can receive email at least on one of those. The whole procedure takes only couple minutes and at the end you get nice, free cert. You can even get a cert for wildcart subdomains (*.example.com) and what's really cool: ACM will also take care of renewal, so it's pretty much maintenance-free.
Setting it up🔗
Now that we have our certificate, let's do the rest. What you need is static website configured on S3 (in theory any HTTP backend would do, but we're trying to achieve server-less configuration here) and hide that behind AWS CloudFront, that's there to do the SSL encryption with our certificate.
Static website setup🔗
I'll be brief here as there's multiple ways to go about it and the only important part is that you end up with all your files in S3 bucket. Name of the bucket doesn't really matter as you'll be using it as a backend hidden behind cloud front.
What does matter is to make sure the objects are publicly accessible. If you want to have index.html being served for directory requests and perhaps a custom 404 page, you'll have to configure static website hosting and configure Index/Error document accordingly.
As for the static page itself, there are many ways to go about it. If you want an inspiration, here's what I do:
I use Nikola to create static files for my blog, I've set up deployment to an S3 bucket, so when I add a new post I just run nikola build and nikola deploy and all is done. (Actually I'm even lazier than that - I have incron daemon watching for changes and running build/deploy automatically)
I chose Nikola because I like Python and it comes with everything I need out of the box. (including thumbnailing, code highlight, graphs,..) Also it's reasonably easy to extend.
However if you don't like it, perhaps consider Hugo, Jekyll or any of the other static site generators. There's a lot of them to choose from.
CloudFront distribution setup🔗
Now we are all set for the last - easiest step. Start by creating a new web distribution. Provide an origin domain name which should be a domain name pointing to your bucket.
If you've set up static website hosting on S3, make sure you're using the website endpoint domain name - it should follow this format: <bucket>.s3-website.<region>.amazonaws.com
Don't forget to add your desired site domain name to Alternate Domain Names list and select to use Custom SSL Certificate - make sure you select proper certificate for the domain name configured above.
Other setting are either good in their default setting or up to your personal preference. I've set the Viewer Protocol Policy to redirect to HTTPS and enabled object compression.
You can also enable logging here, though you can just use something like Google Analytics if stats are all you care about. I've set up logging to S3 bucket just to have something I could feed to ELK stack later on in my experiments. ;)
Next click Create Distribution and you're almost done.
Setting up DNS🔗
Did I say, the previous step was the last one? I lied, there's one more thing.
Go to your CloudFront distributions list and select your newly created distribution. The creation might take couple of minutes (so does any update to it) so brace yourself with some patience. However once done, on the General tab, you should see your CF Domain Name for this distribution - something like "kkcy7p1d33rxai.cloudfront.net"
Copy that, go to your DNS settings and setup a CNAME for your site to point to the domain you just copied.
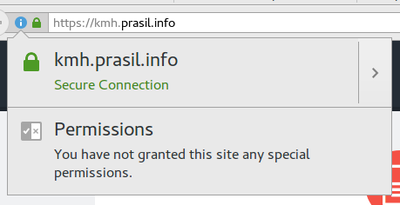
Once all this is set up, you should be able to visit your new and shiny HTTPS enabled website.
Enjoy.
PS: Most of the above can be set up using AWS API, once I have some free time I'll write a blogpost how do all this in an automated fashion.
This article is part of Cloud category. Last 2 articles in the category:
You can also see all articles in Cloud category or subscribe to the RSS feed for this category.
